

Mastering Melted Chocolate: Why It Seizes, How It Overheats, and Proven Recovery Methods
When properly liquefied under controlled conditions, chocolate forms a luxurious, silky, and uniform emulsion that coats surfaces effortlessly and hardens with a brilliant sheen. However, working with chocolate requires precision and vigilance. Introducing even a microscopic droplet of water can trigger an instant chemical reaction known as seizing, turning a glossy bowl of chocolate into a grainy, rigid, and clumpy mess. Similarly, exposing chocolate to excessive thermal energy strips away its delicate crystal structure, leaving behind a thick, pasty, and muddy texture. Understanding the science behind these culinary pitfalls ensures you can prevent disasters, salvage valuable ingredients, and achieve professional results every time.
[ Infographic Placeholder: Critical Working Temperature Limits & Tempering Windows ]
The Science of Seizing: Why Does Chocolate Seize?
To understand why chocolate seizes, one must look at its composition. Chocolate is fundamentally an anhydrous (water-free) suspension of dry solid particles—primarily cocoa solids and sugar crystals—uniformly dispersed within a continuous phase of liquid fat derived from cocoa butter.
Because sugar and cocoa powder are highly hydrophilic (water-loving), they eagerly absorb any stray moisture. When liquid water makes contact with melted chocolate, these dry particulates rapidly absorb the moisture and begin to clump together. Instead of flowing smoothly past one another in a sea of cocoa butter, the sugar dissolves partially into the water droplets and forms microscopic syrup bridges. These bridges cement the cocoa and sugar particles into a coarse, rough, and rigid mass. Once chocolate has fully seized, it is chemically impossible to restore it to a smooth liquid state suitable for dipping or enrobing.
Proactive Strategies to Prevent Seizing
Because seized chocolate cannot be completely reverted to its original silky form for fine confectionery work, prevention is your absolute best defense. By maintaining a strictly controlled, moisture-free workspace, you can eliminate the vast majority of seizing hazards:
- Ensure Utensils Are Bone Dry: Verify that every mixing bowl, spatula, whisk, and thermometer is completely dry before it touches your chocolate. Even a tiny bead of water left inside a bowl from washing can ruin an entire batch. Avoid using porous wooden spoons or cutting boards, as they trap microscopic amounts of moisture deep within their grain and can easily transfer humidity to your ingredients.
- Manage Your Double Boiler Carefully: If you use a double boiler (bain-marie) to melt your chocolate, keep the water below the bowl at a gentle simmer rather than a rolling boil. Vigorous boiling creates heavy, billowing steam, and rising water vapor or popping droplets can easily splash over the rim and contaminate your chocolate. Better yet, turn off the heat source entirely just before placing the bowl of chocolate over the hot water, allowing residual steam-free heat to do the work.
- Wipe Condensation Constantly: As water heats beneath your melting bowl, condensation forms rapidly on the underside of the vessel. Regularly lift the bowl and wipe the bottom clean with a dry towel to prevent water droplets from dripping into your workspace or running down into the mixture.
- Never Cover Warm Chocolate: Resist the temptation to place a lid or plastic wrap tightly over warm, melting chocolate. Trapped heat will cause moisture to evaporate and condense on the underside of the cover, creating heavy water droplets that will fall directly into your chocolate and cause an instant seizure.
Can Seized Chocolate Be Rescued?
If your smooth, glossy chocolate has suddenly transformed into a stiff, heavy paste, do not throw it in the trash! While it is no longer usable for dipping truffles or molding delicate shells, it is still entirely safe and delicious for general baking applications.
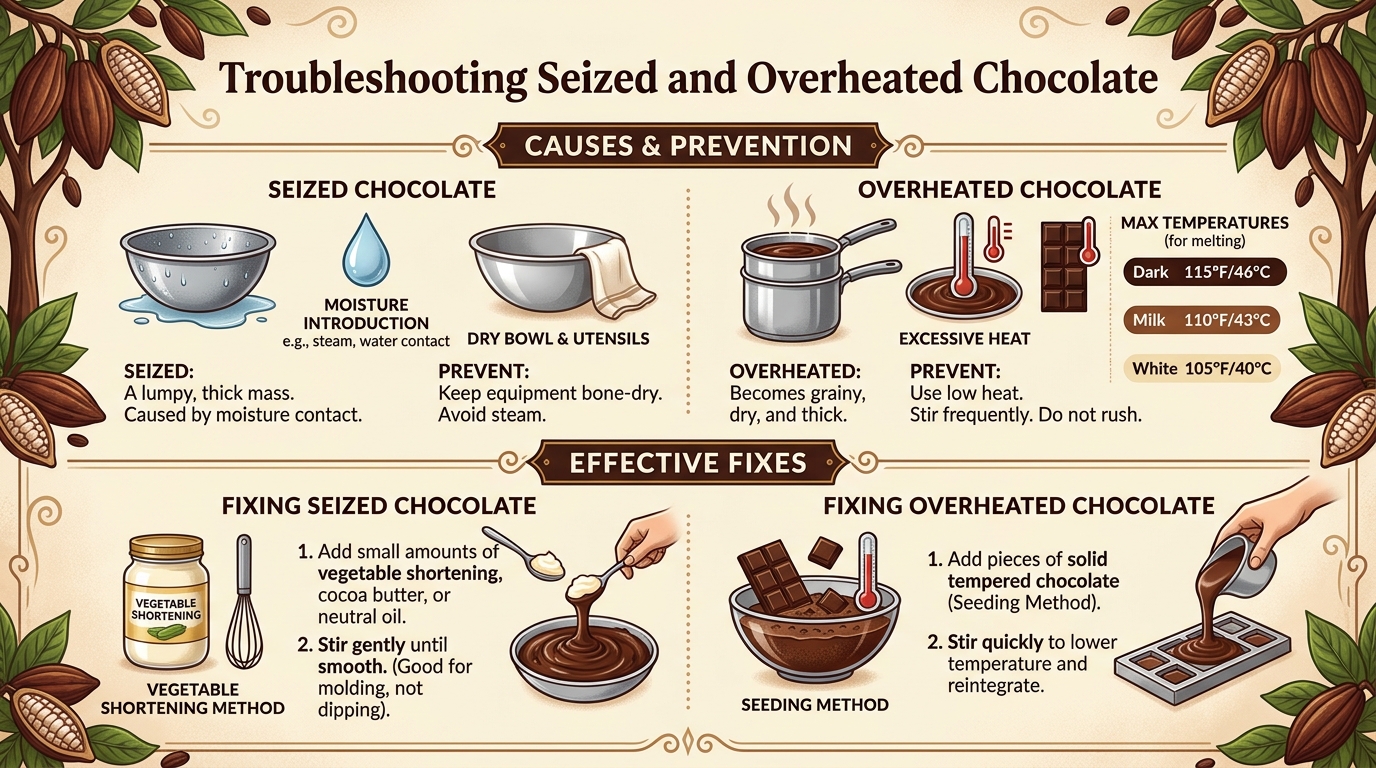
You can salvage its utility by incorporating an emulsified fat. Stir solid vegetable shortening gently and evenly into the seized chocolate, using a ratio of approximately 1 tablespoon of shortening for every 6 ounces of chocolate. Stir slowly until the shortening melts, the mixture loosens, and the texture becomes pliable again. This rescued chocolate can now be folded directly into brownie batters, chocolate cake mixes, cookie doughs, or heavy pastry fillings.
Understanding and Preventing Overheated Chocolate
Water contamination is not the only hazard facing the home chocolatier; thermal abuse is equally destructive. Chocolate is exceptionally sensitive to high temperatures, and exceeding strict thermal ceilings destroys the delicate crystal structures required for a proper snap and shine.
Dark chocolate should never be heated above 120°F (49°C), while milk and white chocolate varieties contain higher concentrations of milk solids and sugar, making them even more delicate and vulnerable—they should never exceed 110°F (43°C). It is remarkably easy to breach these temperature thresholds if you blast chocolate on full power in a microwave or leave a bowl over vigorously boiling water. Overheated chocolate loses its silky luster, thickens into a pasty sludge, and develops an unappealing, muddy appearance.
Effective Techniques to Save Overheated Chocolate
If your chocolate has suffered from thermal overheating, prompt action can sometimes reverse the damage before the cocoa butter permanently separates:
- The Seeding Method: Immediately remove the bowl from your heat source and transfer the hot chocolate into a clean, cool, dry container. Stir in a handful of finely chopped solid chocolate chunks. The cooler solid pieces will absorb excess thermal energy, rapidly pulling the overall temperature down into a safe working window.
- Sifting Out Lumps: If persistent, cooked lumps form within the mixture, pass the warm liquid through a fine-mesh sieve to strain out texturized clumps.
- Fats and Emulsifiers: Stir in a small spoonful of neutral vegetable oil or melted shortening to restore fluidity. Alternatively, incorporate a few drops of liquid soya lecithin (a powerful food-grade emulsifier available at health food stores) alongside a small amount of freshly melted chocolate.
- Immersion Blending: For stubborn, thick mixtures, use a handheld immersion blender pulsed on low speed to shear the particles back into a smooth emulsion. If these recovery methods fail, save the batch for robust baking projects and start fresh with a new package of chocolate.